Using the Control Center Table
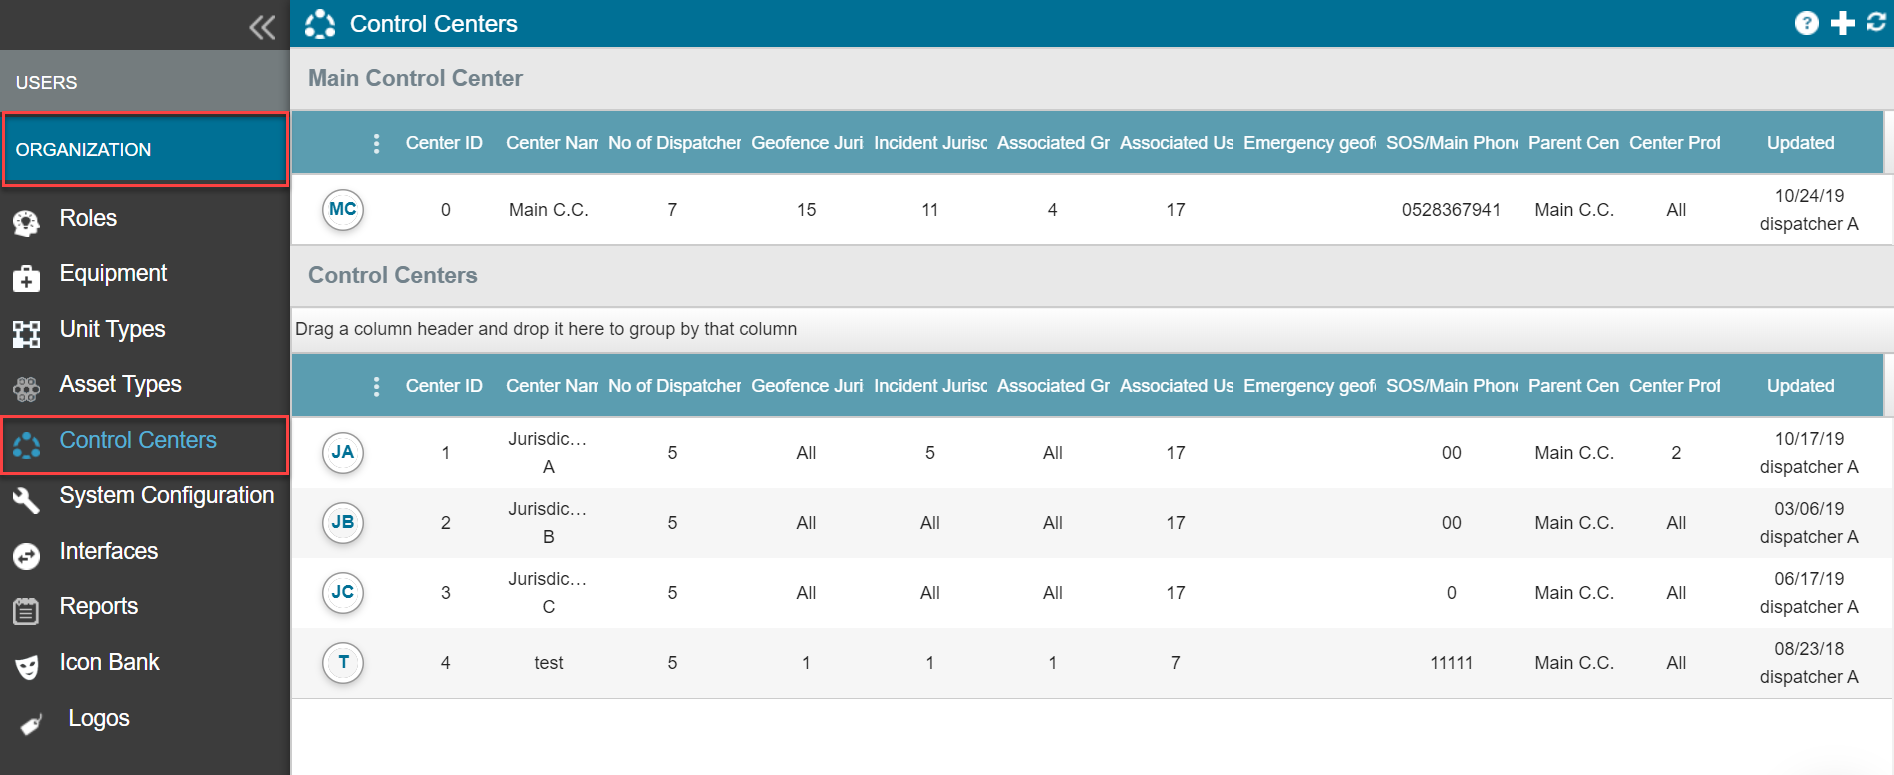
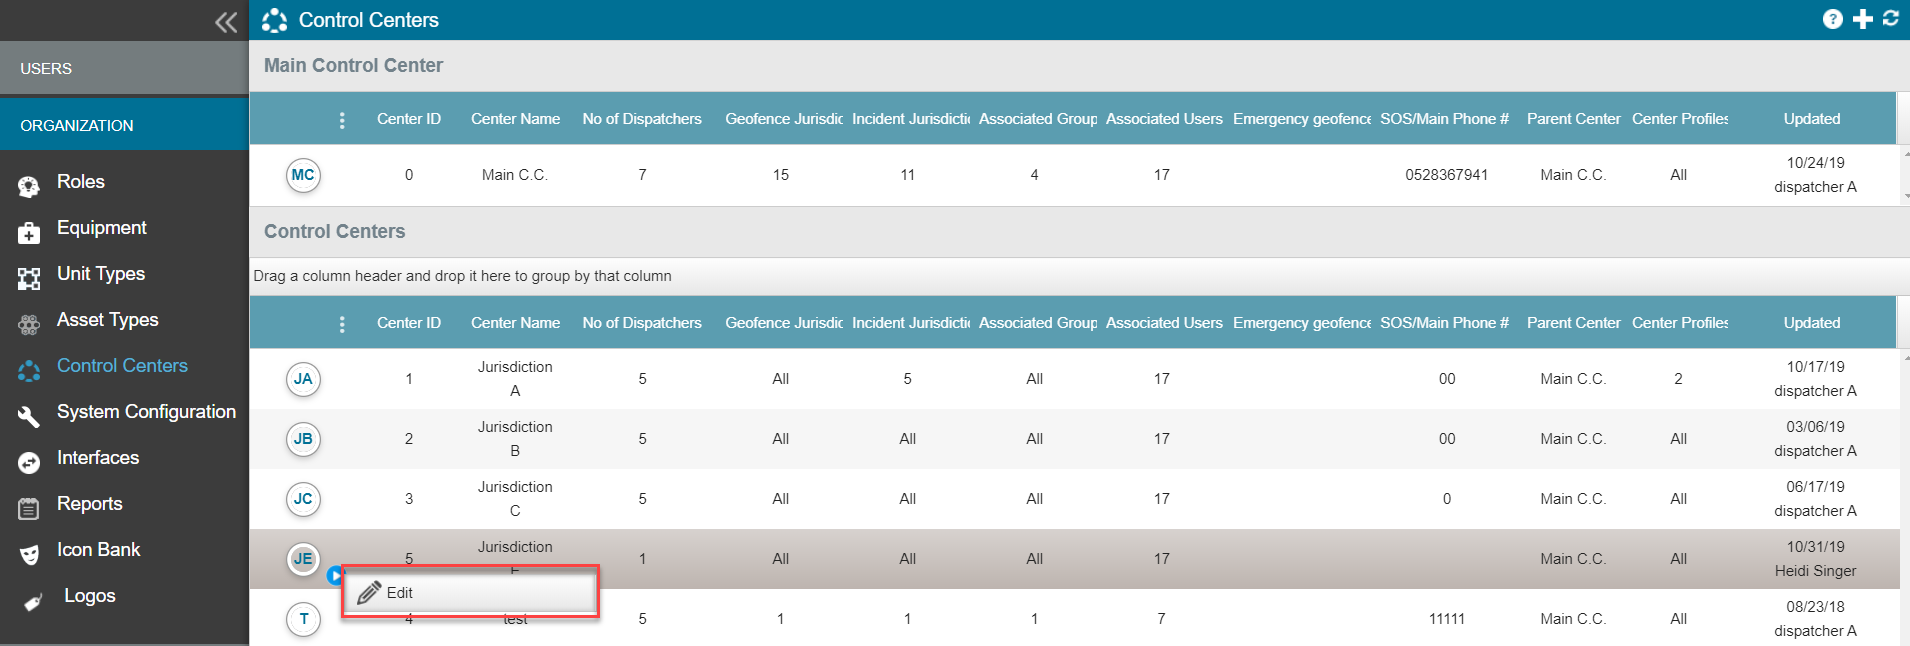
The Control Center table displays all the dispatch centers associated with your organization. The table is divided into two sections: The Main Control Center and Control Centers. The Main Control Center section displays information for your primary center, and the Control Centers section shows the information of any secondary Control Centers you have created.
To navigate to the Control Center table
- From the Main screen, select Settings > ORGANIZATION, and then select Control Centers.

The Control Center tables opens.
The Main Control Center has by definition, unlimited jurisdiction over all entities (users, groups, geofences/polygons, incident types etc.) in your organization. The Main CC's jurisdiction cannot be restricted. Therefore, editing actions within this section are limited to: changing the name of the center and SOS/Main Phone Number, and adding dispatchers.
The Control Centers have several Actions associated with editing, deleting, selecting dispatchers and the editing the center's map.
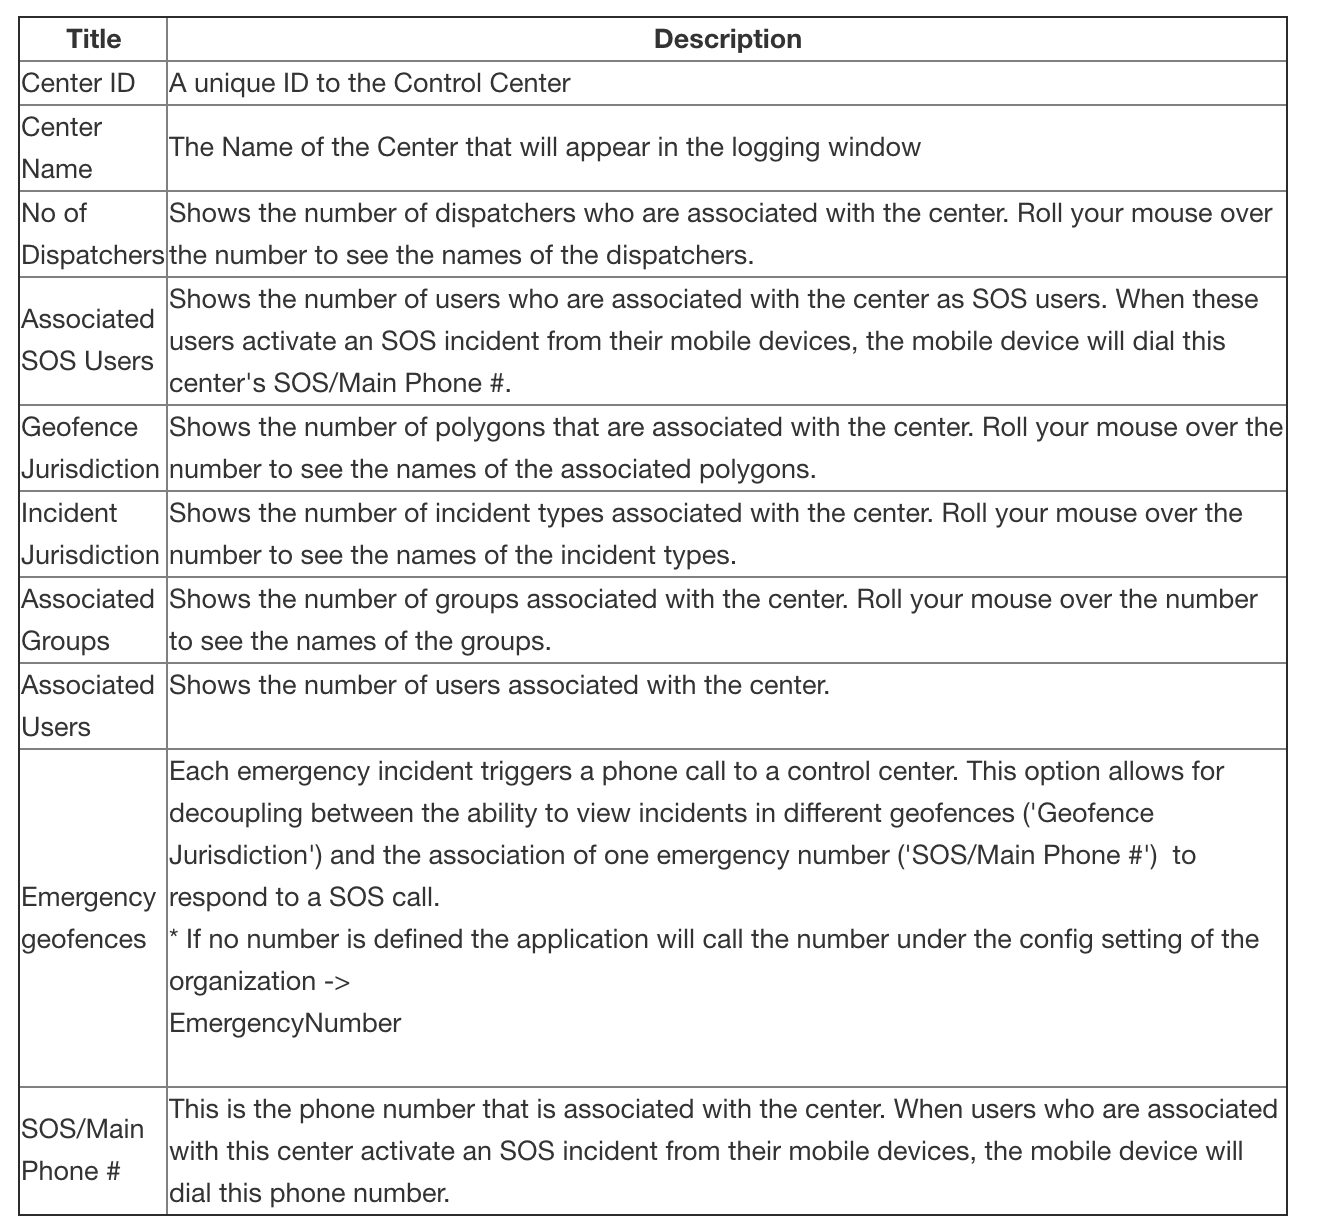
Control Center Table Descriptions
The table below sets out the descriptions of each element of the Control Center Table.
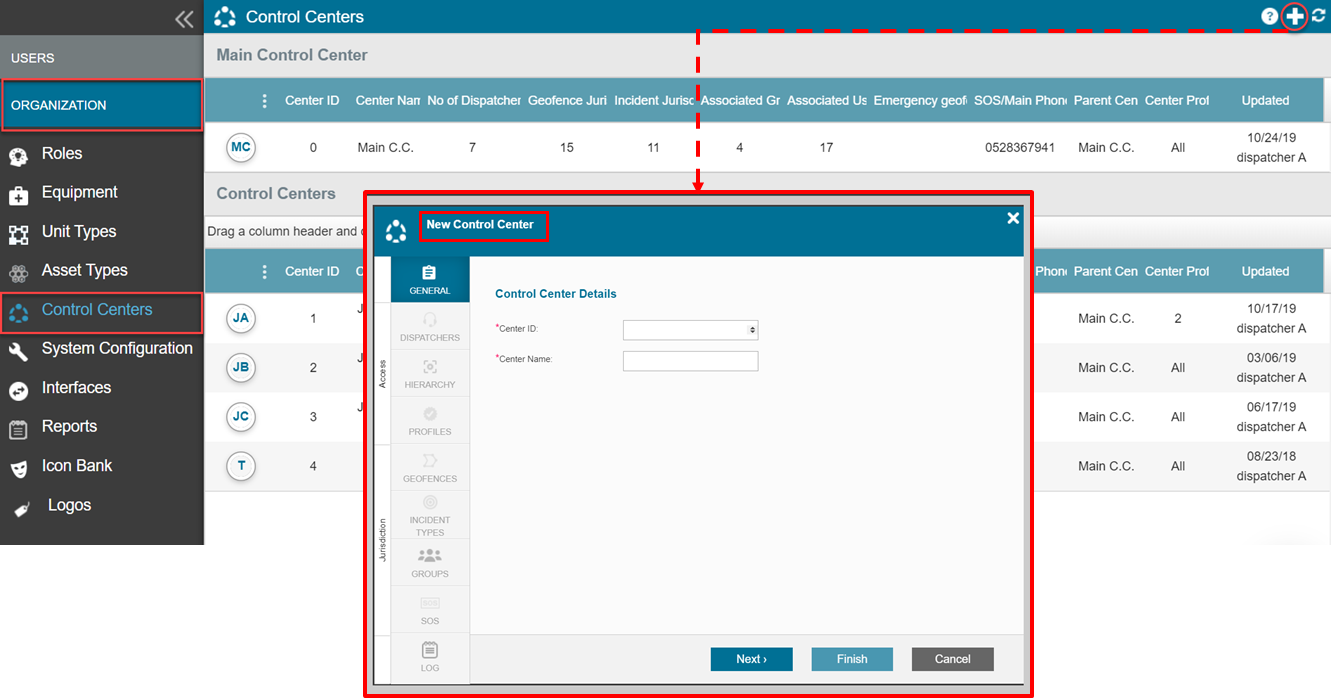
To add a new Control Center
- Select the + to open Control Center module.
- In the General tab use the arrows to select a Center ID and provide a name in the Center Name field.
- Select Next.
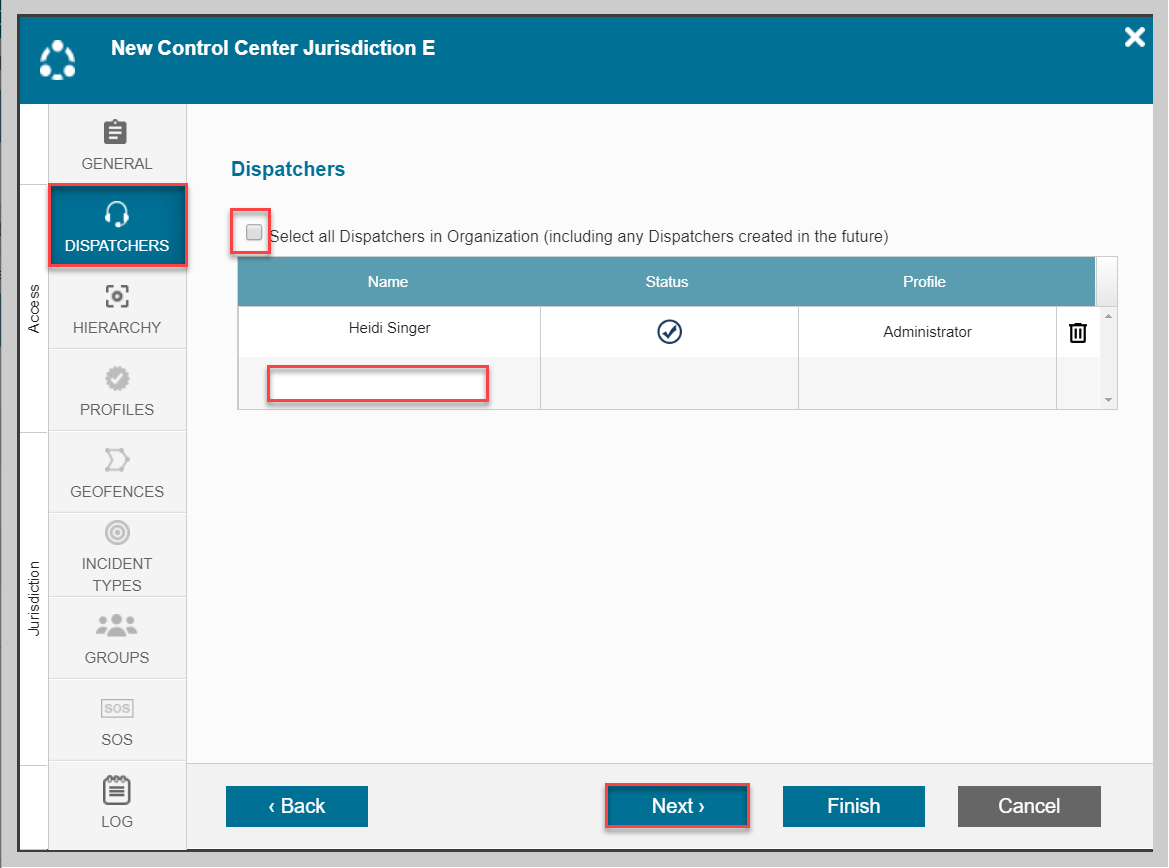
- In Dispatchers tab either select All Dispatchers in Organization (including any Dispatchers created in the future) or enter the specific dispatcher into Name field.
- Select Next
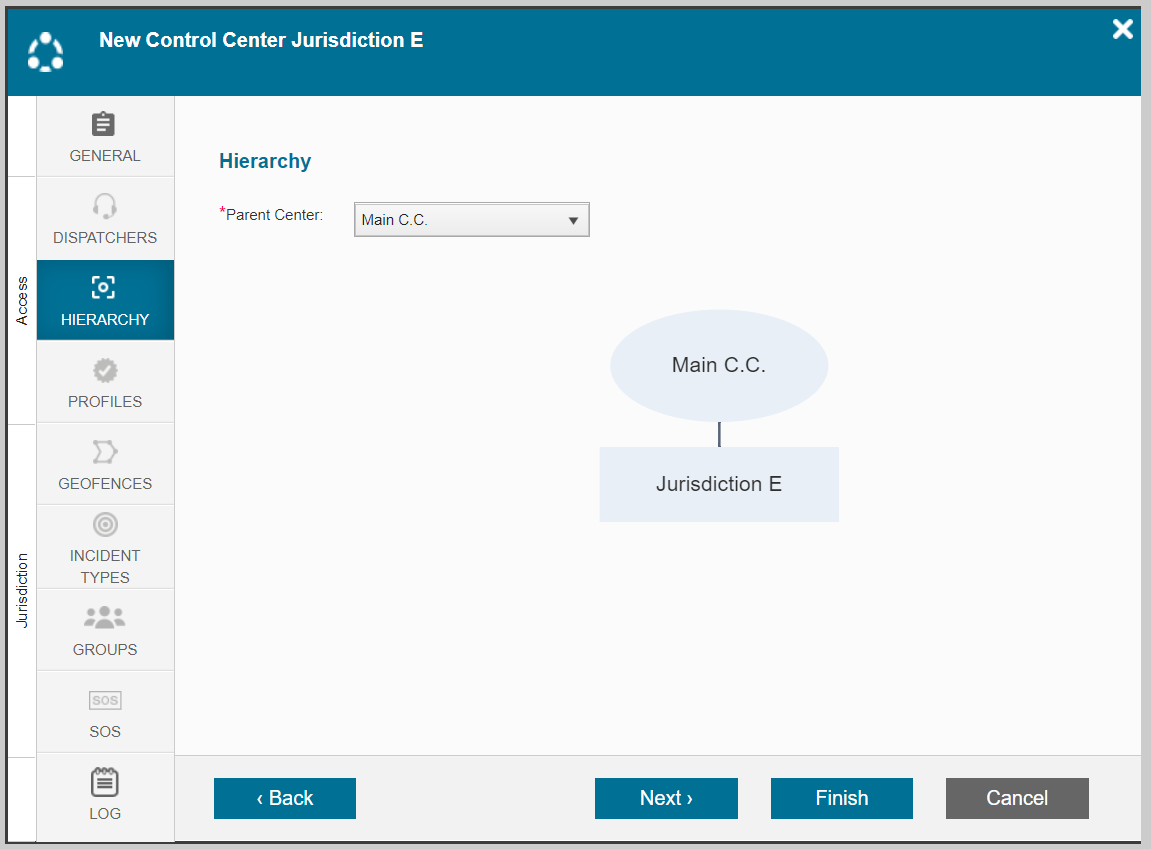
- Select the Parent Center using the dropdown on the Hierarchy tab
- Select Next.
- In Profiles tab either select All Permission Profiles or specific Profiles from the dropdown list. This list will define which profiles will be available to the CC operator/dispatcher when creating/editing user profiles
- Select Next.
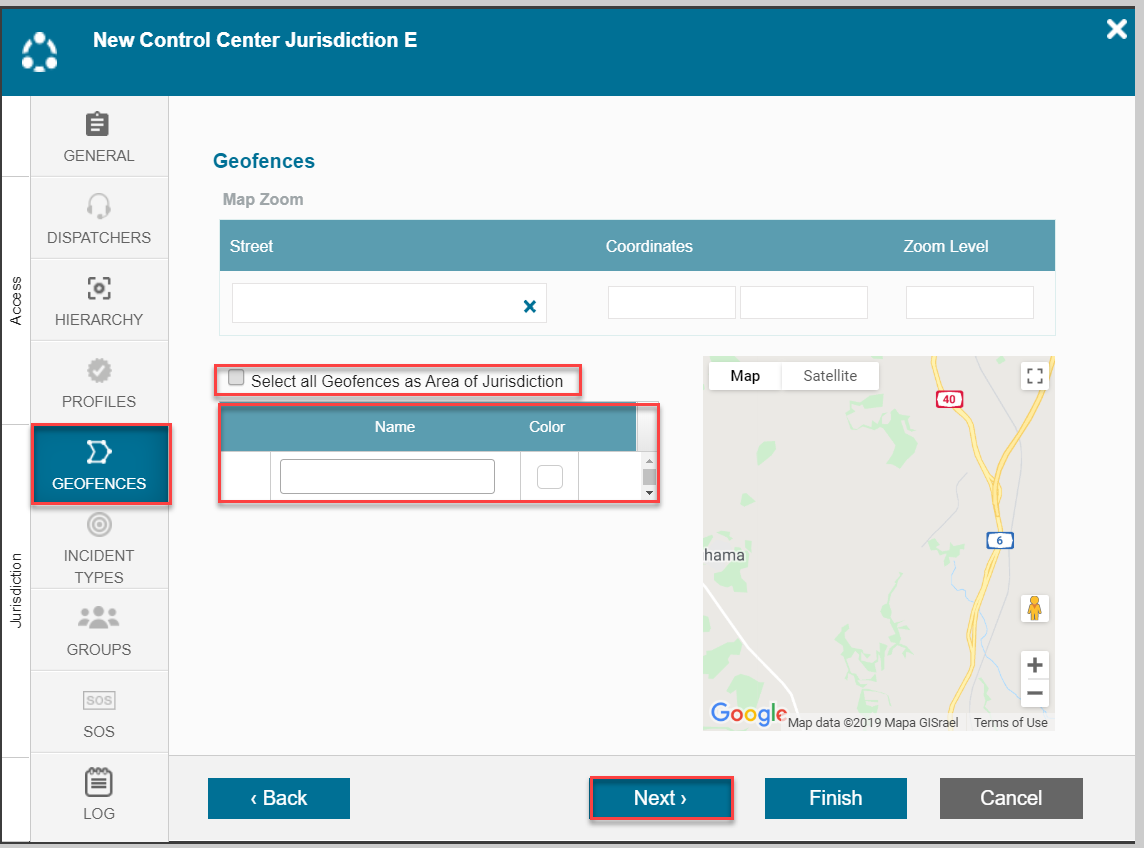
- In the Geofence tab either select Select all Geofences as Area of Jurisdiction or using the dropdown, select the relevant geofences.
- Select Next.
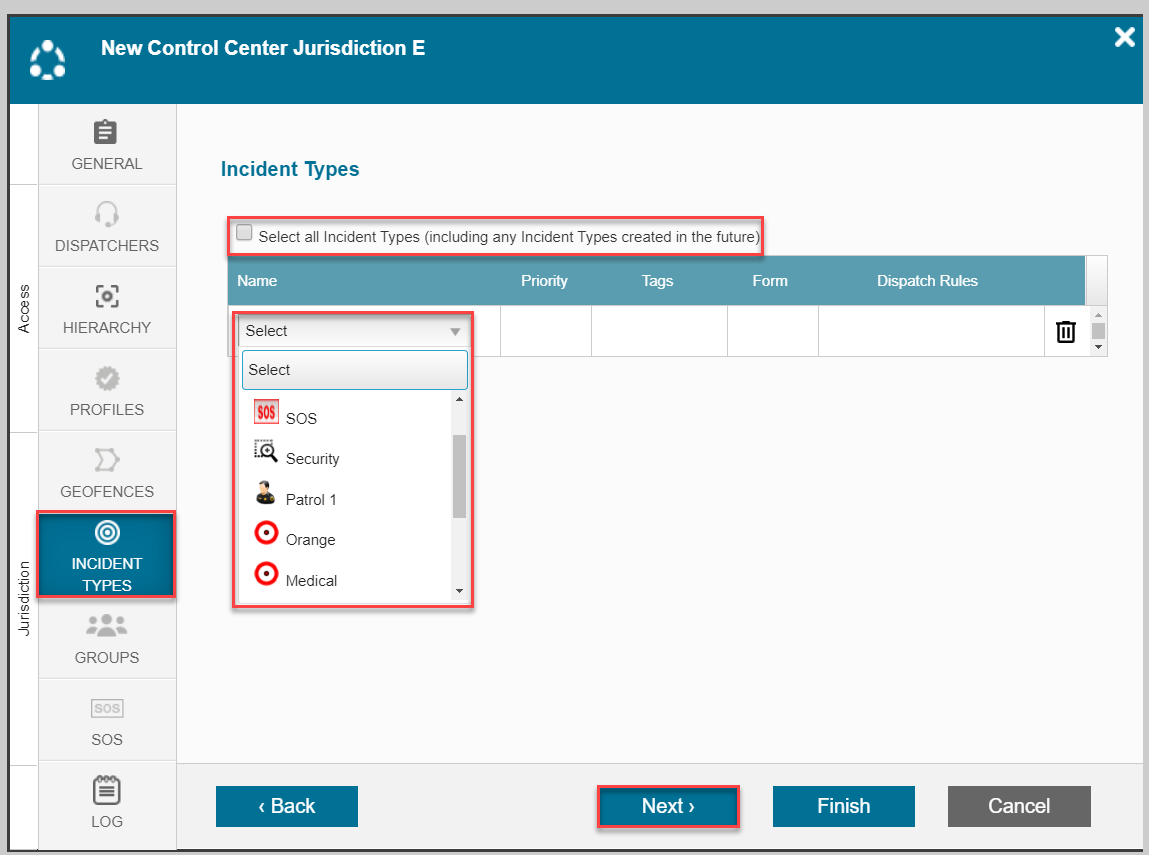
- In the Incident Types tab either select Select all Incident Types (this will include also Incident Types created in the future) or using the dropdown, select the relevant Incident types.
- Select Next.
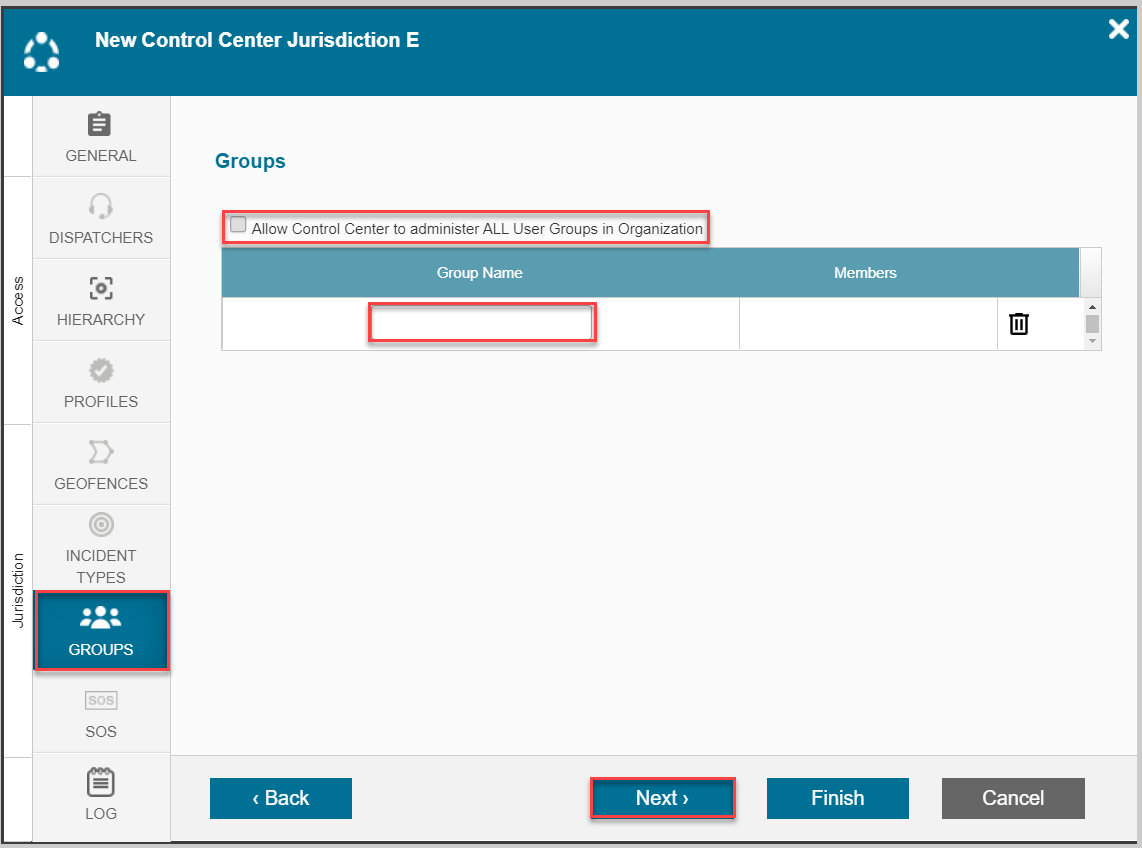
- In the Groups tab, either select Allow Control Center to administer ALL User Groups in Organization (including any Group created in the future) or enter the relevant Group Names in the text box.
- Select Next
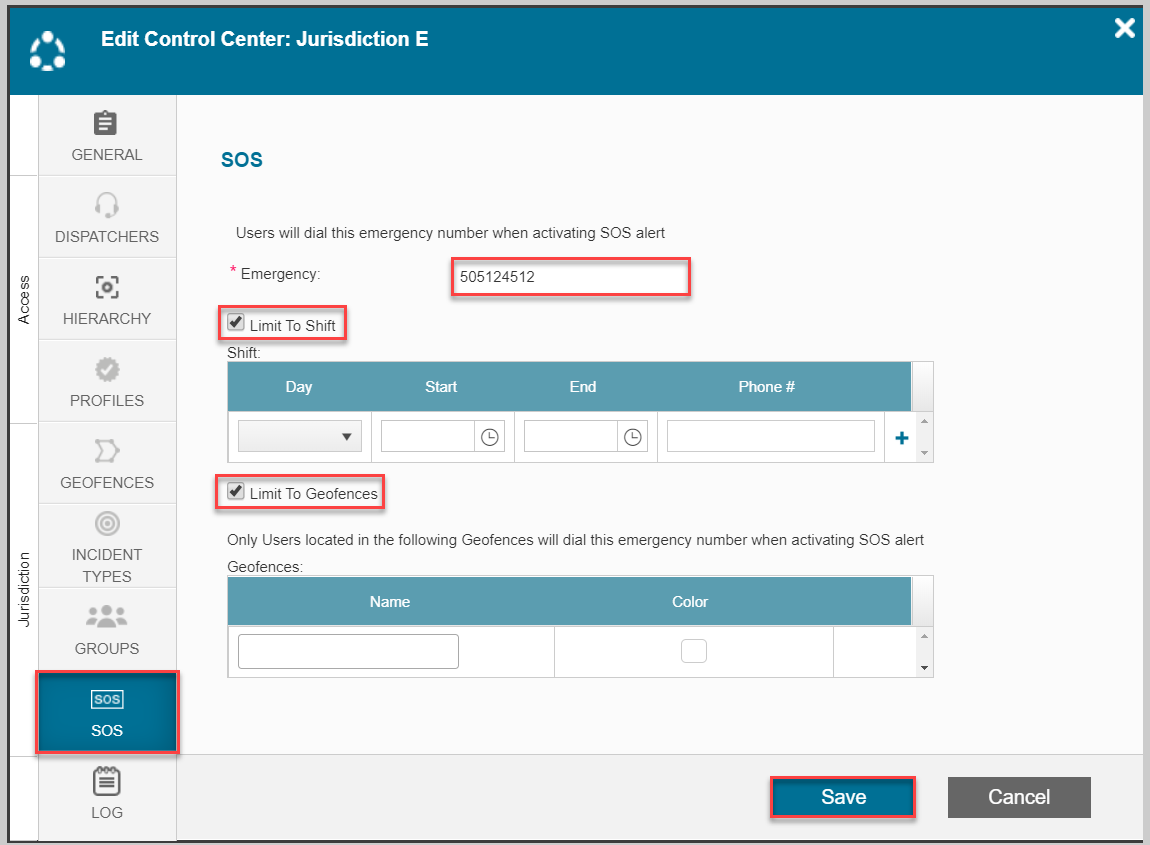
- In the SOS tab type in the emergency number in the field. This is the phone number that will be dialed by the app when activating an SOS alert. You may also select Limit to Shift or Limit to Geofence for that emergency number. Additional dropdown fields appear for you to provide preferred Shift settings and Geofence settings.
- Select Save
- Close the Control Center module by selecting the X.
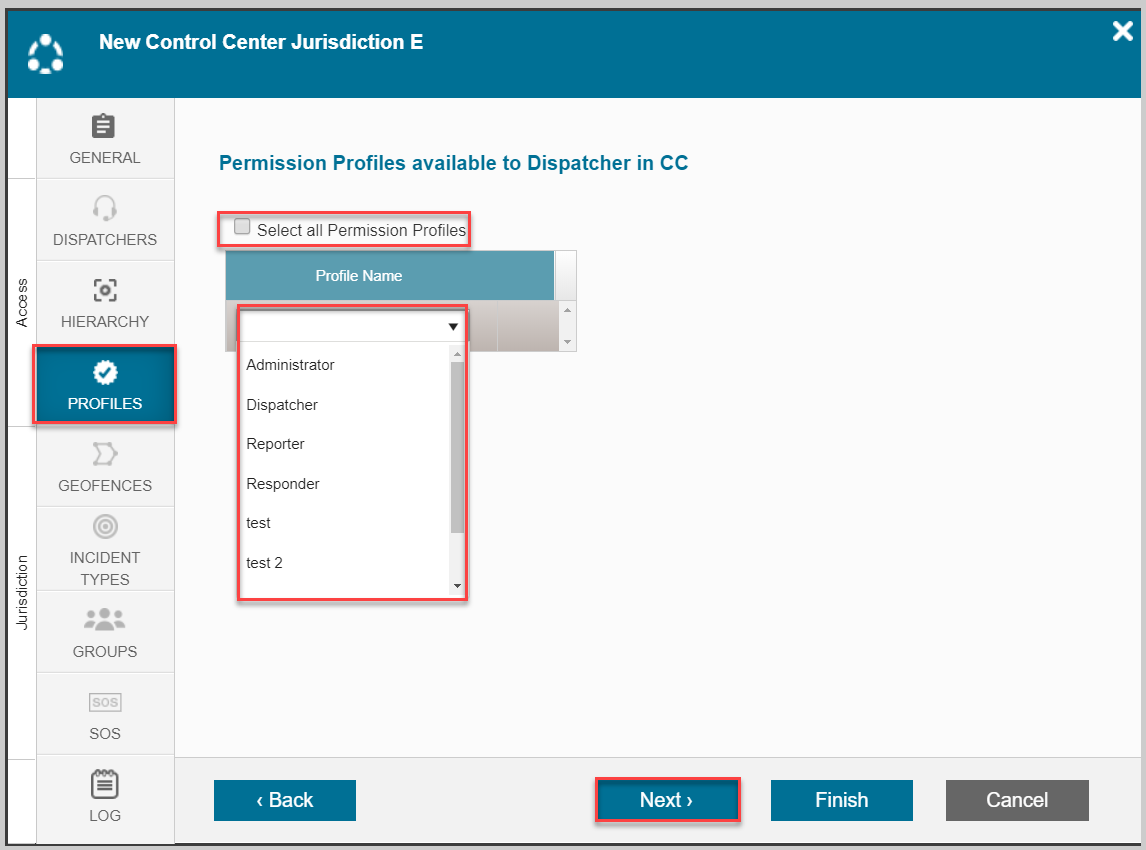
Note: selecting the "All" option means that also profiles that do not exist but are created in the future will also be associated with this CC.
Editing a Control Center
To edit a Control Center
- In the Control Center table, stand on the icon of the v you wish to edit.
- Select Edit and the Control Center module opens.
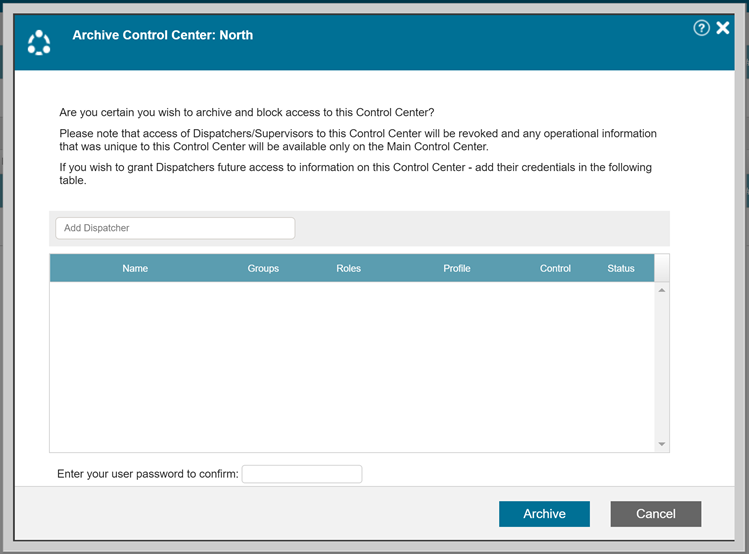
Archiving a Control Center
With the new Archive Control Center feature you can archive and lock a Control Center. All associated data is retained and remains accessible to the Dispatchers you specify for future access.
To archive a Control Center
- In the Control Center table, stand on the icon of the Control Center you wish to archive.
- Select Archive and the Archive Control Center module opens.
- In the text box enter your user password.
- Select Archive.