Creating Map Tiles
Floorplan map layers are created by taking a cleaned up digital image of each floor and rendering it into a map tile using MapTiler's software. The floorplan layer is then imported into NowForce and can be displayed as a map layer.
Preparing Digital Images
To render the building floorplans as map layers each individual floor must be generated into a digital format image.
The floorplans must be in either JPG or PNG format.
Once you have created your digital image it must be cleaned.
To clean your digitized floorplan
- Remove all labels, notes, roads, legends from the image.
- Change the background of the image to transparent.
- Crop image to the external walls.
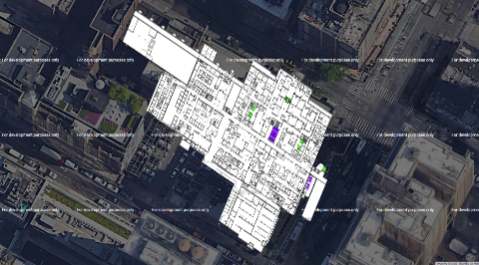
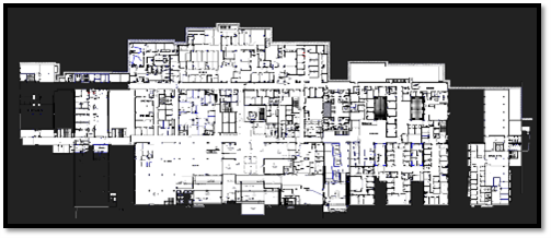
An example of a correctly rendered image with no visible labels or extra roads, and cropped to a building’s external walls is shown below.
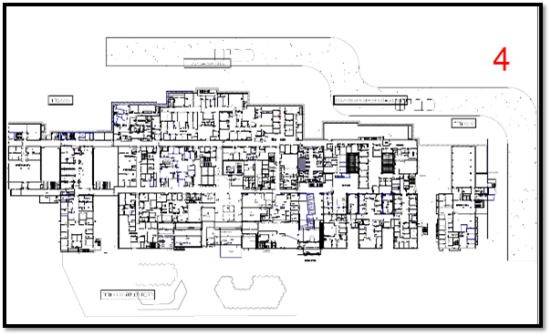
Below is an example of an incorrectly prepared image:
Creating Map Tiles in MapTiler
To Create Map Tiles
Once you have downloaded and installed MapTiler Desktop Start edition:
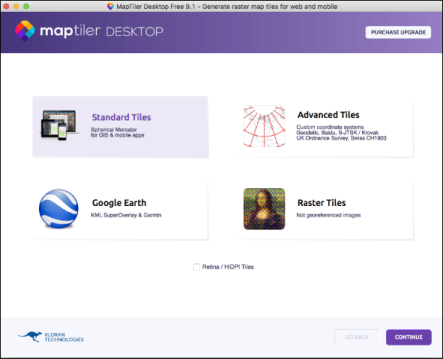
- Launch MapTiler.
-
Select Standard Tiles.
You can follow a MapTiler tutorial here.
- Select the cleaned up floorplan image that you prepared in advance.
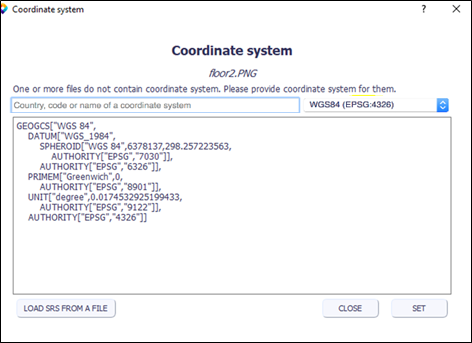
- Set the Coordinate System to WGS84 and click SET.
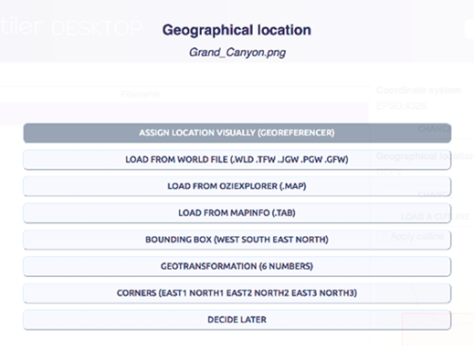
- Select ASSIGN LOCATION VISUALLY.
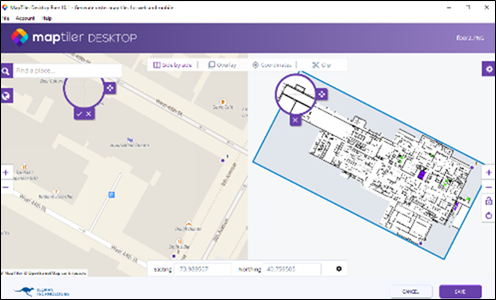
- Zoom in on the world map, to the location of the building you want to map.
- In the right-hand pane, select one corner of the floor plan, and then select the exact physical location on the map in the left-hand side pane.
- Repeat this for three additional points on the floor map.
- Adjust the anchors by dragging the dots you marked to the precise position.
-
Click SAVE.
-
Click CONTINUE.
-
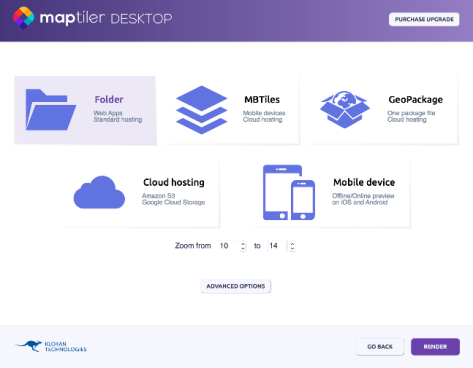
Select Folder and a Zoom from setting of 16 to 22, and click RENDER.
To ensure your floorplan displays correctly on the NowForce Map you must select a Zoom from setting of 16 to 22.
- Create a new folder named “Floor X” with the floor number of the floorplan you are processing (e.g. “Floor 1”).
- Open the googlemaps.html output file to check that the floorplans align correctly on top of the building. You can test the different zoom levels views.
-
Repeat these steps for all the floors in the building.
For the full list of screen controls see this functionality list.
Once the rendering is completed, a sub-folder for each zoom level (17, 18, 19, 20) appears within the "Floor X" folder.
![]()